It All Started with the Windshield Seal...
Part 1 - Windshield & Painting
After our Thanksgiving camping trip in 2003, we decided it was time to replace the windshield seal in the MOG. On that trip, we spent several hours one evening putting on many miles in the rain... getting wet while driving in a rainstorm is no fun, and we've done it many times. We had had enough!
The truck without the windshield looks a bit like an old horse drawn buggy.

Since the windshield frame would need to be painted, we decided we should paint the cab while we were at it. Here you can see the seams glass bead blasted to remove all possible bits of rust.

Getting the windshield frame apart was a lot of work.

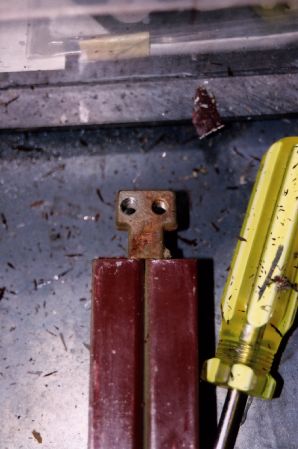
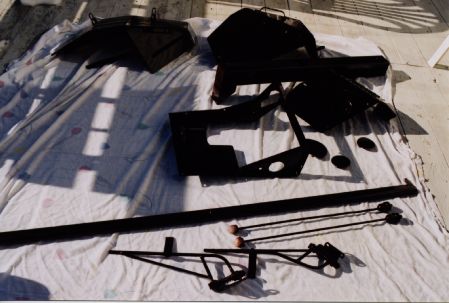
Each end is bolted on with two bolts, and the center bar of the frame is held to the top bar with two screws. The screws came out just fine. One of the 6mm bolts came out properly, the head broke off of the other one. The two 10mm bolts both had to be drilled out. We were fortunate to not damage the threads in the frame and the bolts were readily available from out favorite metric bolt supplier, so putting the frame back together shouldn't be too difficult.

We had the dash masked and were considering the job of sanding to prep for paint when we remembered that one of the things on our list was to change the steering box. Our current steering box has a bit of slop, we picked up a new one from Scott at NWMF2002, we need to install it! Due to our transmission swap experience at NWMF2002, we realized that with the steering box out, we were more than 1/2 way to having things un-hooked enough to remove the cab. So....... after asking Ken if he was willing to help, we decided to remove the cab from the truck. This way, we could paint all those regions that were still showing green.
After a few more hours of work un-doing connections, the cab was ready for lifting. Our shop has a lifting eye in the ceiling, attached to a steel beam. With a strap around the frame of the cab above the transmission attached to a come-along at the ceiling, we were able to get the cab just high enough to clear the chassis. This could not have been done in our shop with the windshield still on.

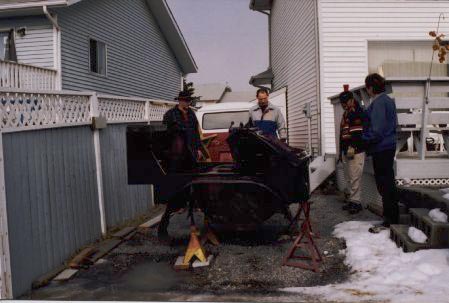
We loosely reattached the steering box & put the steering wheel on so that Keith would be able to actually aim the chassis where we wanted it to go. Tall as he is, there was no way he could reach the foot brake, the emergency brake was all he was able to use to use to stop the truck.


The truck rolled back out of the shop easily, and we easily pushed it to the gates of our parking pad. This bit of a bump is enough to need four-wheel-drive on an icy day anyway, so this is where Ken's MOG gets into the action.

The 2x4 as a push-stick may not look like much, but it did the job. We pushed our MOG sideways until it was straight with the parking pad, then Ken backed into the parking pad across the alley to push our truck into our parking pad. Sorry, no pictures of the operation as Sharon had to change hats from photographer to traffic director.

The MOG is parked in his usual spot in the yard, but backwards & missing some bits!!!! We tarped it over & moved back to the shop to deal with the cab.

We all thought that the cab looked like an interesting race car sitting by itself, so we just couldn't resist taking this shot. No, the cab isn't still suspended from the ceiling, it is sitting on jack-stands, we just haven't removed the rigging yet.

Here you can see the four jack-stands that the cab is resting on. Also the still green area where you can't apply paint when the truck is fully assembled! Our initial purple paint job over 2 years previously was simply to make the truck "not green". We did very little prep, partially due to time restraints and partially because we thought the military green would be porous enough to take the paint. We were wrong, very little purple paint stuck well to the green, so this time we've sanded all areas & are priming & painting everything we can get to. A lot of purple has peeled off in the last couple years, & a lot more sanded off very easily. This paint job better last longer!
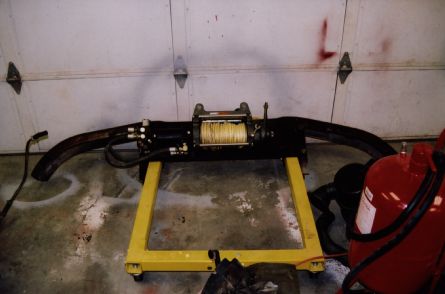
With our hydraulic winch bolted on, the bumper is too heavy to carry around much. The bottom 1/2 of our engine stand works great to move it around the shop on!


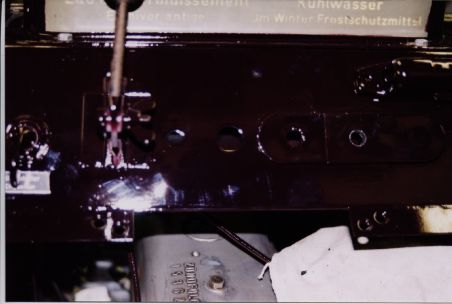
This is the area behind the driver's seat, beside the transmission (where the stock 24V radio plug was). On the rear wall behind the driver's seat we have our 24-12V converter. This area is where wires pass through the cab, there are connections to our solar panels, 12V battery bank, camper, and others. When the truck was together, access to this spot for cutting holes was limited, and you really want to limit the number of cutting sparks in the region. While things were apart, we decided to make a tidier job of the area. We cut a bigger hole in the floor before painting. After painting we installed an aluminum cover plate with the holes we need cut. We added one more hole with a plug, and have space for two more holes should future expansion require the room.


Here you can see the collection of wires that we have coming through the floor holes. Also the stereo, CB, and 24-12VDC converter with attendant “stuff” (including the solar regulator). Since attempting to seal a 40 year old soft-top borders on impossible, we have a vinyl rain cover for the converter (fried the first one in a rain storm). The stereo also has a rain cover.

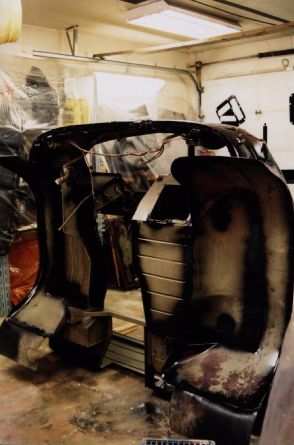
Once we had as much prep done as possible with the cab sitting normally, we stood it up on its back for easy access to the underside. We were surprised to discover that it balances beautifully. The cab balanced, free-standing, for all of the bead-blasting and paint that were required for the underside.


Here are a few shots of what little rust the cab actually had. Not bad for a 40 year old machine! The floor on the driver's side was probably the worst - understandable when you consider snowy boots climbing in in the winter.

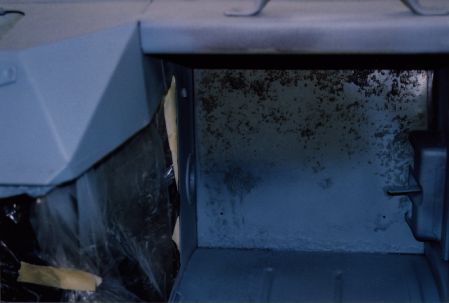
Not a view you get very often! The area under the reservoir was rather filthy when we started - likely related to leaky valve cover (replaced) & a leaky oil filter o-ring at one point, not to mention just the usual filth in a place you can't clean.
Not long after we got the truck we moved the position of the choke to the side of the doghouse, rather than the face. Two reasons for this: the choke cable now doesn't have to do a 90 degree bend, and we found we had to loosen the cable to get the valve cover off for valve adjustments - not fun!

Here is a view of where we've changed the switch holes in the dash (above you can see 2 little squares of metal tacked in place on the backside). The first shot is after primer, before filler & paint. The second shot is after filler & paint - the camera has a focusing issue on the shiny paint!!! We've had switches in these holes for some time. In the lower hole we have bent two switches, while trying to get the valve cover off. The upper switch was so close to the reservoir, the wire insulation was rubbed off. We decided this would be a good time to solve these problems, we'll just have a longer line of switches across the dash.


Since the original objective of this project was to seal the windshield, we bead-blasted all the seams & sealing surfaces. The frame has now also gotten a good coat of POR-15 to help preserve it.

Where the windshield mount bolts to the cab was not pretty. Fortunately, the rust was very light just on the surface. This area has also been sprayed with POR-15 to give it as much protection from future rust as possible.


The bottom of the cab... prepped for painting, POR-15 sprayed on the seams, and then coated in Tie Coat primer. If you've ever used POR-15, you know that nothing sticks to it, except their primer. It is a very pretty blue, but that just isn't a good colour for a UniMoG!!!


Gray primer is sprayed over the blue, in an effort to make the top colour "take" better. Then the bottom of the cab is sprayed with black paint & asphalt undercoating. We want the bottom as protected as possible, and any sound deadening effects we may get from extra coatings is also welcome!

The foot wells were the rustiest areas of the cab. Understandable, considering 40 years of snowy boots. Both were coated with POR15 to try to stop the rust, here they are with the Tie Coat primer applied.

Here are the corner of the cab and a view of the dash with the freshly applied paint. The colour didn't reproduce well on film. Now that the paint is dry, it is not as brown as it shows while still wet (had only been on about 10 minutes here).

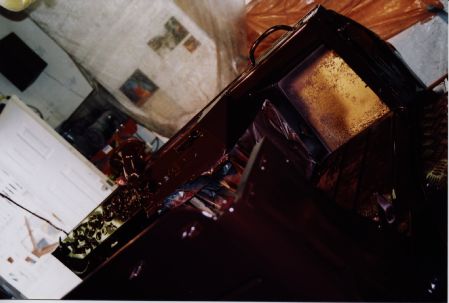
None of these pictures of the paint job do the colour justice. The first shot in the sun, or the other shots with the parts stored temporarily in our '65 Bus. The coolant reservoir in the 4th frame comes closest to showing the colour.
After we'd pushed the chassis out into the alley, four guys were easily able to carry the cab from the shop to the parking pad, where it is sitting on jack-stands. After a bit of gravel leveling, we adjusted the jack-stands to their lowest height so that the cab would have the least possibility of falling over. It is now wrapped in sheets & a tarp awaiting the time when we can put it back on the chassis.

Of the pictures we've had developed so far, this one comes closest to showing the colour. VERY dark purple.
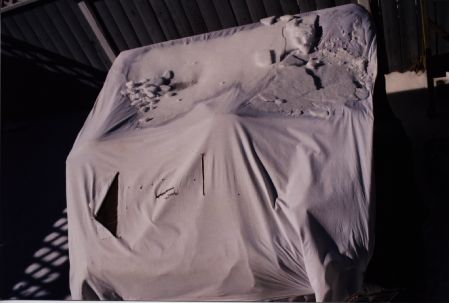
Since we don't really want the inside of the cab exposed to the weather, we've wrapped it up. The paint is covered with old sheets, since it is so new we want to try not to damage it. Then a canvas tarp is tied down over it. The white sheet on top is to try to keep it from getting quite as hot under the tarp on sunny days. A few days after we moved the cab out we got a significant snowfall, so we were happy to have it wrapped up.

Here is the chassis in the shop. It is hard to get a good picture of that thing in there, it really fills the space!
The head decided that it wanted a little more attention than we had intended, details of the Head Rebuild are on a separate page.
While the head was at the machine shop, we worked on painting the chassis & bed of the truck.


The chassis of the truck is painted black. We left it on its wheels so that it could be shifted around in the shop to gain the best access to all parts possible, but we really didn't want painted tires!

While in the mess of painting black, we made sure to coat the new steering box that we're installing. It was green... not a colour we want to see on our truck!


These three shots show the bed sanded, primed & painted. We didn't worry quite as much about the final appearance of the bed as we did about the cab, at some point we expect to be replacing/rebuilding the wooden camper by framing in the steel bed & sheathing it in aluminum - this paint job was only to make the two halves of the truck match.

With a shop only inches bigger than the disabled UniMoG sitting in it, one has to get creative! Painting the fuel tanks, front bumper & side window frames around the chassis was an interesting challenge.

With the cab off, we discovered leaky front shocks. We've managed to source reasonably cheap shocks from NAPA here in Canada, hopefully they hold up for a reasonable length of time. We're accustomed to destroying shocks seasonally on our Baja, but we hope to get a little longer on a set of MOG shocks. Here are the old & new MOG shocks, both extended & compressed. Just for fun we threw in a rear Baja shock (fully extended gas shock). It is hard to read the tape measure in this image, the Baja shock is almost 18" long, the new (black) truck shock is around 32" long, extended. These shocks aren't a perfect match for the truck, as the rubber bushings are meant to be sandwiched with the mounting bolt, & the top shock mount has ears that prevent this. We've installed them with several large washers & will be keeping a close eye on things to see how the shocks fare. (Update: as of 2008 these same shocks are still in place and performing decently. They don't handle quite as well as they did and may get replaced in the next year or so. Pretty good for "cheap" aftermarket replacements!!!)


Two nice shots of the engine, without the cab.

The original point of this whole exercise was to replace the windshield seal. The freshly painted frame, new glass and new rubber were introduced to one another on the living room floor one afternoon. Getting the glass into place with the new rubber was challenging. Putting on the top bar of the frame went fine until about the last 5 mm, that was done (very carefully so as not to scratch the new paint) with a pipe clamp. New bolts complete the unit.
We lifted the cab back in place one morning with the help of a few friends. Five guys lifting were able to put the windshield-less cab back on the chassis in a matter of minutes. Once we bolted it down & did back up the electrical connections we installed the rebuilt windshield and put the top back on the cab one evening. The next afternoon we reached the point of starting the truck to run in the new head gasket. The MOG started well and purred for the 1/2 hour that it ran to heat up the gasket for the hot-torque on the head. After the engine is all warmed up, the head is re-torqued hot to seat the new gasket. During the re-torquing procedure, we heard a terrible SNAP sound - we were both hoping for a broken torque wrench, but no such luck. The block broke open around one of the bolt holes.
Click to read about our Engine Replacement.