UniMoG Creature Comforts
and other modifications.
Since we've been known to put on something like 1700km in a 5 day long weekend, the inside of the MOG needed to be a bit more comfortable. We've done a bit of work on the interior of the cab, as well as built a pop-top camper that slides into the bed of the truck.Our off-road camping experience has evolved over the years. We started with a tent and our Baja Bug. Then we camped for a time in our '65 Bus (you wouldn't BELIEVE some of the places you can drive a Bus!). With the Bus, we enjoyed being a turtle, with our home on our back, but there were two problems. We were abusing the poor old guy, and we always end up camping in some wet conditions... a trip without rain is very rare. One cold, wet, October day, after spending the afternoon getting un-stuck, we realized that the back of the Bus was not big enough for camping in inclement weather. The bed takes up the whole space, except for a very small space near the back door. All other storage is under the bed. Cooking indoors?.. Forget it. Eating indoors?.. Not comfortably. Soon after that trip, we ordered the MOG.
Our camper is carefully designed. At this point, it is a plywood prototype. We wanted to prove the concept before building it with more expensive materials. The design has proven itself. We replaced the roof in the summer of 2001 with a custom built aluminum one. The old wooden roof was simply too heavy, and had started to leak. When the wooden lower part rots away (one more season? two? too many now, but we'll get to it someday...) it will be replaced with one of very similar design. The material for the bottom part has yet to be determined... another wooden one?.. steel?.. aluminum?.. or some combination thereof.

The view in the cab from the driver's door.
Pretty much the first thing we did was added a headliner to the canvas top. The canvas snapping on the steel bars while driving was nearly deafening. We discovered once the headliner was installed that it has the added benefit of absorbing a large amount of engine and transmission noise, the canvas reflected it back at us.
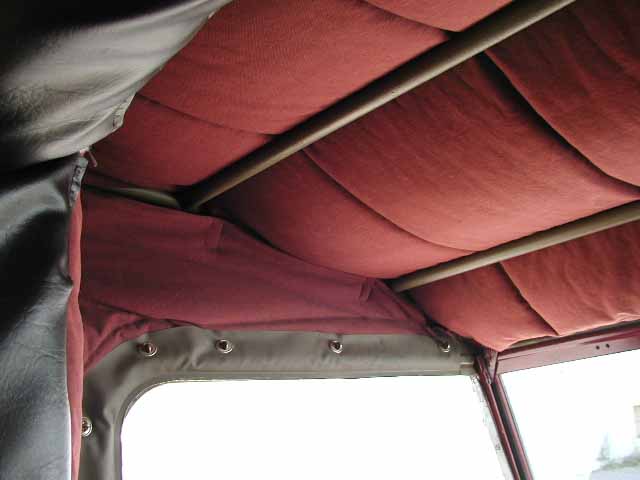
The headliner is a heavy purple cotton twill with a black broadcloth backside. The top part has two layers of quilt batt in between, the sides and back have one. The top slides between the steel bars and the canvas, with a thin bungee cord through a casing at the front hooked on the bolts holding the top on each side. The string allowed the front to sag a bit too much. We have since added a wooden dowel in a sleeve along the front of the headliner, tucked behind the bolts that hold the cab top in place. Much better!!! The sides are sandwiched in the canvas that wraps around the door frame, and velcroed to the top of the headliner.

In the corners there are strips of velcro slipped behind the bars to hold the top in place.

In the upper back corner, there's a flap that slips in beneath the bar, then holes where the buckles that hold the canvas come through. The bottom of the back is held down with a thin bungee strung through eyelets that were already in place in the cab. The headliner has buttonholes to slide over these eyelets.
The headliner is held in place around the window hole with velcro. One inch wide velcro sewn to the liner adheres to half of the two inch wide velcro stapled to the cab canvas. The other inch of the velcro on the canvas holds our tunnel in place when the camper is on the back (which is the usual). For when the camper is off, we have a flexible window (the same stuff that they make the rear window in convertibles out of) that velcros in place. The tunnel is marine vinyl both inside and out, with quilt batt in between. The bottom of the tunnel has two layers of batting for comfort climbing between the camper and the cab. We find that we hear less transmission noise with the tunnel in place. The tunnel also velcros in on the camper side.
Our second modification for our comfort in the cab was to insulate the doghouse. We have multi-layered sound deadening foam on the underside of the doghouse which is about 1 1/4" thick. It works very well. Combined with the carpeting we've added bit by bit (low-pile rubber-backed carpet mat), all of these modifications make our cab MUCH quieter. It is possible to carry on a reasonable conversation while driving down the highway.
As can be seen in the top picture, the driver's seat has been replaced with a bucket seat from a VW Vanagon. The original seat was too broken down to continue using, it had become uncomfortable and spewed stuffing all over the place. With the removal of the headrest and addition of four tabs on the rails of the VW seat, the seat bolts right in place and is quite comfortable. The passenger seat has also been changed to the VW version.

Behind the driver's seat is mounted our 24 to 12 volt converter. The terminal strip to the upper left of the converter feeds our 12 volt accessories. The solar regulator to the right of that takes care of charging our auxiliary batteries and shutting things down when the battery voltage drops too low. The switch selects the method of charging the auxiliary 12 volt batteries. The charging options are solar panels on the roof (not yet installed), the 12 volt output from the converter, or shut off all charging.

Since our first convertor fried when it got wet, we've covered the whole setup with a piece of vinyl as a rain guard. Note the mount point for the lap belts we've installed. Also note the fire extinguisher complete with padding to keep the driver from bashing an elbow. (Yes, the padding is a toque at the moment, a padded cover to match the headliner is on the todo list.)

Along the back wall between the seats we have our stereo (complete with rain guard) and the handset for the car kit for the Satellite phone. (The kit was actually mounted in the camper, we don't have the Sat. phone anymore.) There was also a speaker for hands free mounted above the fire extinguisher. Here you can also see a bit of our carpeting. Behind the passenger seat is our first-aid bag (all you can see is that tiny strip of red). The stereo speakers don't appear in any of these pictures, but we have a set from a bookshelf unit that we hang just inside the camper on either side of the window. We have a second set of speakers which have now been installed in plywood boxes in the corners behind the seats. Not perfect sound quality, but not bad!
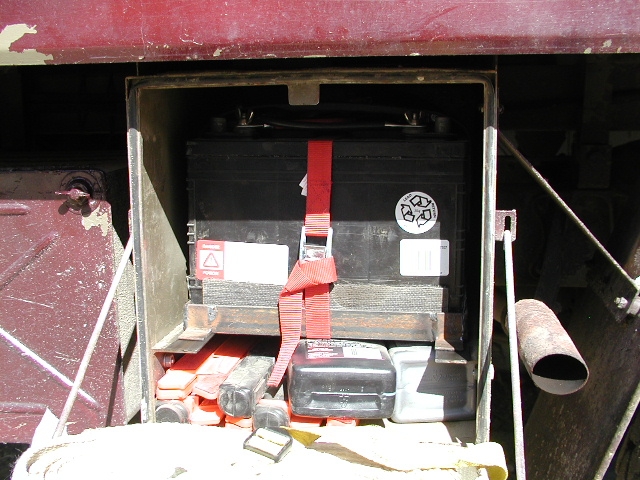
We converted one of the side boxes to a second battery box which houses our 12 volt batteries. Two 12 volt deep cycle batteries hooked in parallel are installed to power our fridge, and camper lights.

We constructed a steel frame, lined it with carpet for protection, and strapped the batteries down with a nylon cinch strap. The frame has tabs on the bottom to hook beneath the two pieces of angle iron we bolted into the box for rails for the batteries to slide on.
The strap eventually deteriorated due to the acidity of the battery box evironment, and the tow strap is now carried in another location. We have built a steel frame that bolts the batteries down, and use two small c-clamps to hold the frame to the runners beneath. The door frequently comes open during rough off road situations, but the batteris have never moved!

Our dash is not quite stock either. One of the first things we did was move the choke button from its original position (to the right of the hand throttle in the bottom position) to the side of the doghouse (to the left of the turn signal switch). This allowed the choke cable a straight shot to the carburetor and made it that we don't have to remove the choke cable to remove the valve cover to adjust the valves.
Several switches have been added, for our electric fuel pumps, extra lights, etc.
The magnetic clips are wonderful for holding pencils and notes.
The magnetic base protractor (round thing to the right of the coolant reservoir) is a good, cheap way to be able to measure our side-slope angle. Can also be positioned on the top of the door to measure angle of ascent.
There are two 12 volt lights wired in series for interior lighting. One is mounted under the dash on the passenger side. The other is mounted to the heater housing.

We have added some instrumentation to the dash, and we're not done yet! The arrow on the left points to our transmission temperature gauge. The arrow on the right points to our tach. Both are 12 volt, so when our converter died we were without them, but you CAN drive the truck without them, you just have to pay more attention to the amount of radiant heat you're getting from the transmission.
To the left of the horn button beneath the dash is the remote cable control for our winch.

The cable is strung along the steering column and comes out through the grille. Using this method we are able to control the winch either right at the valve, or from the driver's seat. We've used this remote control a couple of times and it works very well.
Also note the Master-Pull synthetic winch line. We had squished our wire rope pretty badly in a couple of places and decided that the increased cost was worth it to keep from having to keep replacing the wire rope. The line should pay for itself pretty soon, as it bounces back when you squash it. A real added benefit is the light weight of the synthetic rope. We have already done a couple of fairly hard pulls with the synthetic line, and it performs very well. The piece of old green tarp is bungeed over the winch line to protect it from UV rays.
That green tarp has now been replaced with a custom-fitted vinyl cover, elasticsized around the bottom. The winch line has also been replaced with a new synthetic line, as a rough spot snagged the first cable and eventually ate through a spot. The sound parts of the original line are very useful with the snatch block.
While we're looking at the front of the truck...

We've added a pair of side lights to the front of the truck (12 volt, wired in series). They are positioned to increase the arc of light in front of the truck out to the sides to aid depth perception. They also help keep you from driving off the road down the side of the mountain when you're on a logging road after dark trying to find a place to camp for the night. We put them where we did hoping that we wouldn't take them off on brush. The theory seems to have worked, the narrow passage wand on the bumper got swept off by some alder bushes, but the light didn't move.

The convex mirrors work great to view traffic, there is practically no blind spot. However, there is no depth perception, you can't see how far to back up. We've added these flat round mirrors we picked up at Princess Auto. The mount is a piece of flat bar welded to a 12mm nut which has been tapped through the side to take a 6mm set screw. The mirrors do vibrate and move a little more than we'd like, but work reasonably well. We do have a set of replacement convex mirrors, but we haven't quite figured out the mounts yet... besides, we haven't broken these two yet (we have broken two mirrors already).
Moving to the back of the truck...

Camper top down, tailgate up. The camper is carefully designed to be exactly the same height as the point of the Swiss cab. We figure that the truck does not need any added wind resistance driving down the highway! As an added bonus, we can just sneak the truck in our shop, the overhead door is 8'. The cab of the truck measures 2" shorter than that! Due to the way everything works, the roof of the camper brushes the weather stripping on the bottom of the garage door when we pull the truck in and out. Tight fit!!!

Our custom license plate.

On the right side at the back, we've installed a 6' long ABS pipe. The front end is capped, the rear end has a threaded cap. This tube is for the storage of our hiking sticks and the sticks which we currently use to hold up the top of our camper. There is plenty of space left for other long, thin things that we decide we need to store in there.
To the left of the tube can be seen a piece of fuel line hanging down. This is our extended vent line for the stock fuel tanks. We found that we could smell fuel with the stock vent arrangement behind the cab.
In the jerry can holder, we carry an ammo box with some of our spare parts in it. The box is water/dust proof.
You can also see one of our backup lights. The same as at the front, there are two 12 volt lights wired in series. At the moment, they are turned on by a switch in the dash. We have plans to put a press switch where it will be contacted by the forward-reverse lever when the transmission is in reverse.
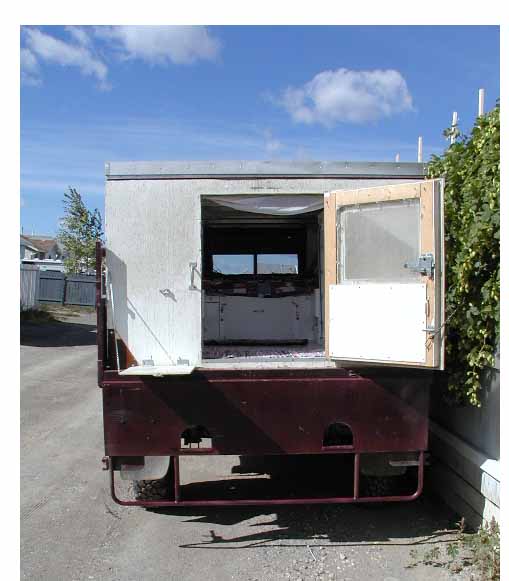
With the top still down, here is a view into our camper.

A better view of our drop down table. It is great for cooking and eating at. Unless the weather (or insect life) is very bad, we prefer to cook and eat outdoors.
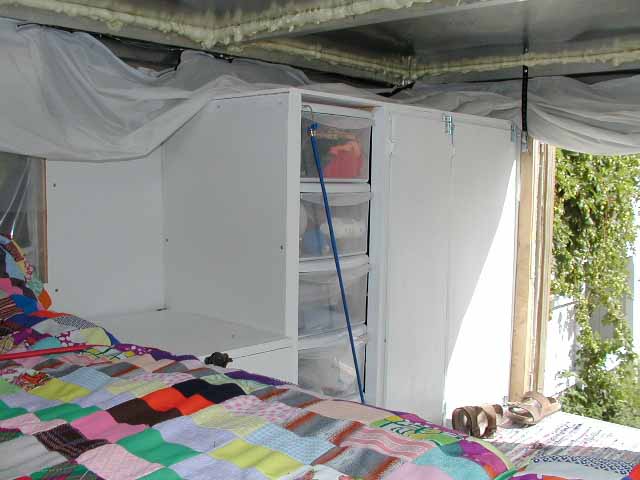
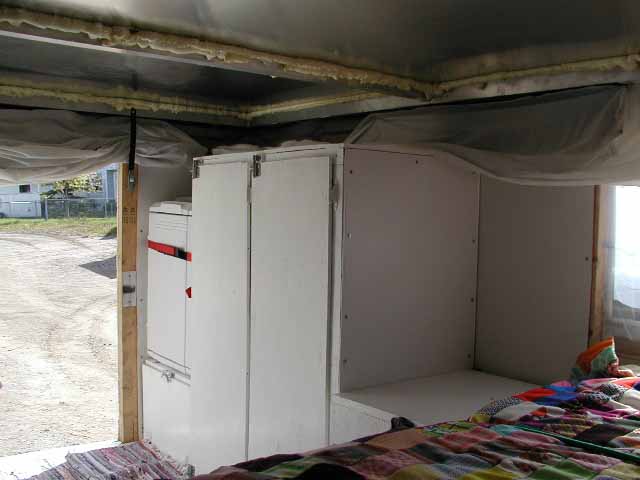
The camper is inhabitable even with the top down, though there isn't much headroom. We need to be able to crawl in and sleep in locations where we don't want to draw attention to ourselves by popping up the top, such as truck stops. The ceiling has been insulated with blue styrofoam since this picture was taken. On both sides, right beside the bed, are seats.

The top of the seat lifts to expose a removable wooden box, the opening is tall enough for pint jars. In the bottom portion of each seat is a drawer, tall enough for quart jars. Sharon has taken up canning in order to get away from the necessity of keeping so much food cold. These seats are designed to hold about a month's worth of canned meals.
In one of the above pictures you can see an electric cooler, things like eggs, cheese, fruit and steak still need to be kept cold.
All of the cupboards are carefully designed for what they hold, with shelves in strategic places. The cast-iron frying pan shelf even has hooks and bungee cords to keep the pans from smashing out through the door.
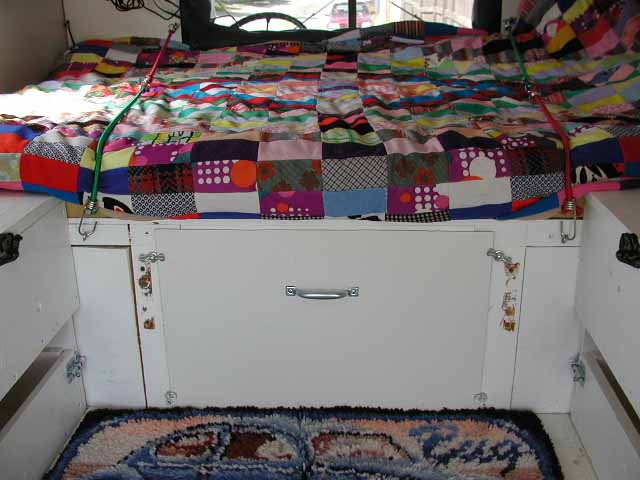
Under the bed is enclosed for additional storage. In this view you can also see the corners of the drawers in the bottom of the seats.
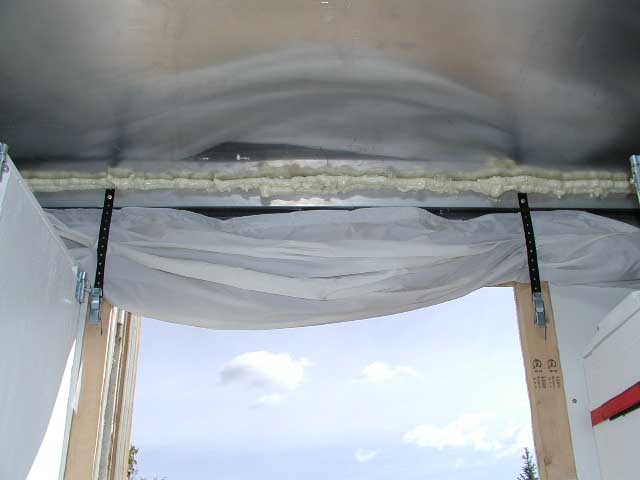
The top is held closed by a strap and catch on either side of the door. This system is not ideal, we're working on it.
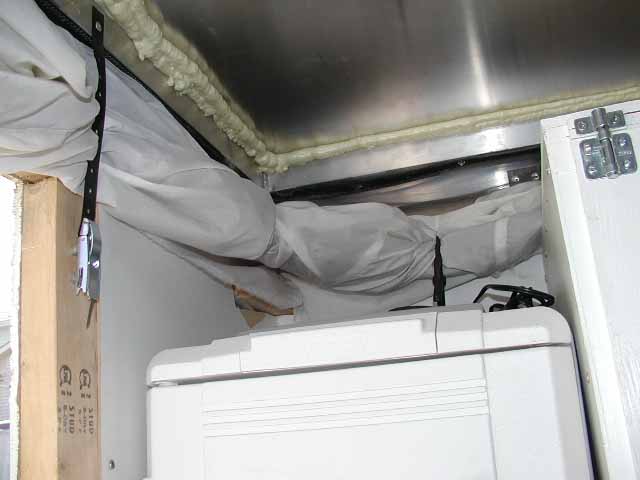
It is very important to keep the fabric of the top rolled and clipped out of the way of the air inlet of the fridge while the top is down.

Top popped. Keith is 6'2" and he can stand up fully from the bed to the back of the camper. We have since augmented the aluminum sticks holding the top up with gas struts. The struts help lift and hold the top, but aren't quite strong enough to trust to hold the roof for the night. The tent fabric is ripstop nylon, held to the roof with self-tapping screws and stapled to the camper body. The shaded portion is bug screen. The nylon is fastened over the screen with velcro at the top. If the weather is conducive, we can pull the nylon down all the way around and be sleeping pretty much in the open air... with no bugs! Our system also works very well to get just the right amount of ventilation while sleeping. Enough that you don't suffocate, not so much that you freeze!

The place is quite roomy with the top up. The countertops are very convenient. A mat at the door keeps dirty boots from mucking up the floor.
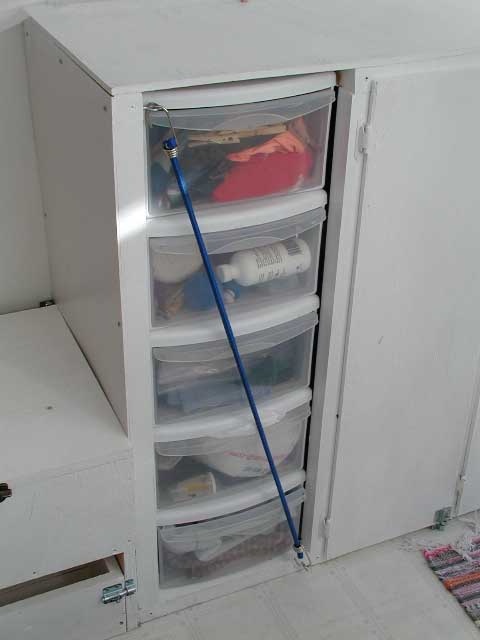
The stack of plastic drawers is great for clothes and small items. The bungee is to keep the drawers shut while off road. This arrangement has been augmented with some extra hooks and a longer bungee zig-zagging back and forth across the drawers, as the the above arrangement didn't always keep the top drawer closed.
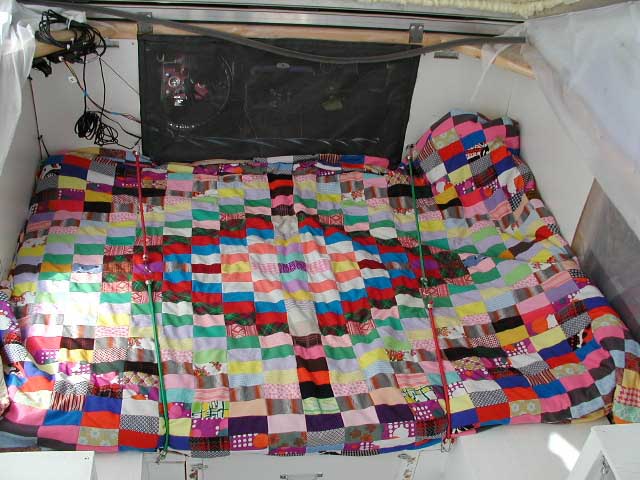
Our bed is 4' x 6'. We have 2" of firm foam covered with 2" of squishy foam, then more quilts than you can imagine. This is a very comfy bed! In the upper right hand corner of the bed is a jut... the filler for our auxiliary gas tank is situated there on the outside, but it really doesn't bother us. Note the bug screen velcroed in place over the tunnel. The cab is not exactly sealed, so we try to keep the mosquitos out of our sleeping space. Also note the bungee cords holding the bedding down. We learned in our Bus that bedding likes to slide all over the place when you drive on the rough stuff, so we keep our bed tied down.

And to keep our toes warm while getting dressed. You have to have the VW's represented wherever you go, right?!