New 1776
After a while, all of your stock of old Volkswagen parts actually starts to reach the point where it just can't be reused another time. We realized this was happening when we started gathering parts to build a new engine for Giggles. All of our old heads had cracks between the valves and spark plug hole. Some of our cases have reached 4th oversize on the bearings, useable, but not necessarily a good idea, especially for a high-performance engine. Our favorite VW parts supplier has started stocking Aluminum engine cases for the Type I, so we decided to purchase one and go from there. It weighs 15.5 lbs more than the stock case, but these cases are also reinforced from the original design, so we decided we might as well get it bored for bigger (90.5mm) pistons at the same time. The 1776cc displacement was chosen from experience with it as a good compromise between performance, reliability, and cost. We don't like how thin the cylinder wall is with the 92mm option, nor do we like how close the cylinder bore is to the head studs in the case with the 94mm pistons.
We chose the teflon coated CIMA Mahle forged pistons for this engine. A bit of dremel work on the inside of some of them brought the weight to within 1 gram of each other.
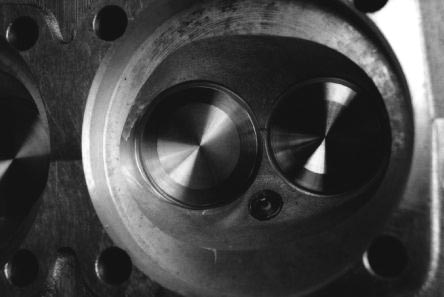
We compromised a bit on the heads & didn't buy the super expensive ones. We purchased a new set of 044 heads. These have been improved from stock (for larger sized engines) with a bit of reinforcement and the spark plug hole is smaller than stock, the spark plug is a 12mm (Bosch 7700 XR2CS) instead of a 14mm. This provides more material between the plug and the larger valves which adds strength over the stock head. The intake valve is 40mm, the exhaust is 35.5mm (fairly conservative). We did some work with the dremel to bring the size of the combustion chambers within 1cc of each other. Head ccing isn't difficult, it just takes time and patience. Compression ration is approximately 8:1, which will be OK on our 91 octane pump gas.
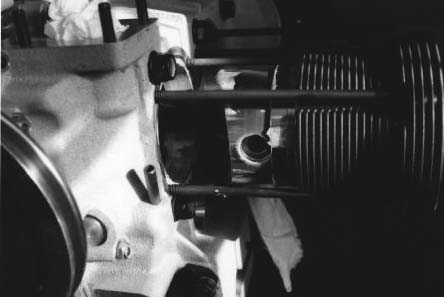
For some bizarre reason, all of the engine building references tell you to install the piston on the connecting rod, then put the cylinder on the piston. This means that you have to deal with a piston ring compressor in amongst all those studs. When we were building our first engine, we soon realized that this was crazy. It is so much easier to slip the piston into the cylinder on the bench, then carefully install the whole assembly onto the connecting rod. You have to make sure that you slide the cylinder off far enough to expose the wrist pin, but not far enough to let the rings pop out, but that isn't exactly difficult. It's also important to get the order of operations of the wrist pin clips correct as you can only put the pins in from one direction this way.
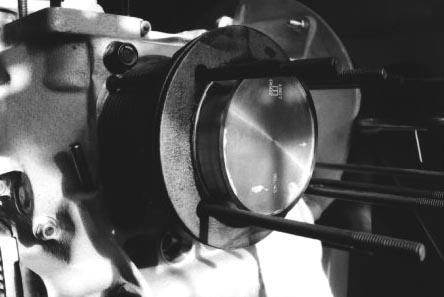
Here is the first of four beautiful pistons installed.
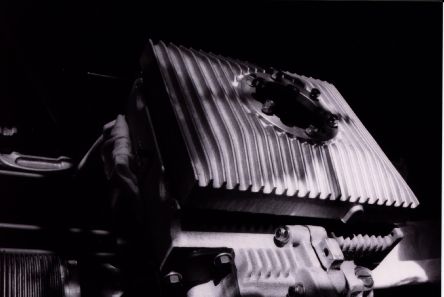
When you have a Beetle that corners as hard as Giggles (his suspension is modified), losing oil pressure on corners is a frequent problem. We've chosen to solve this problem with a deep sump. Our first deep sump cracked around the mounting flange during a little off-road side trip, hopefully we can keep this one intact longer!!!
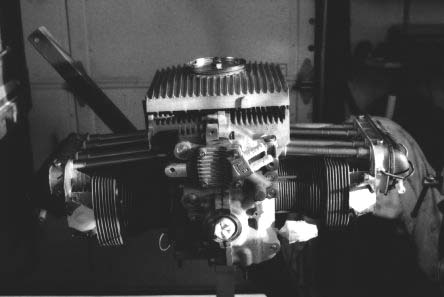
Here is the fully assembled long block, ready for a thin coat of flat black paint, we want all the help keeping this engine cool that we can get! We started upside down to get the best coverage possible, then rotated the engine to paint the rest.
We learned a lot assembling this engine. Our first VW engine building experience was actually a lot easier. That engine was mostly used parts (new pistons, cylinders, cam & bearings, of course) and everything fit together really well. On this engine, we reused a crankshaft from our old 1776 (a broken head killed that engine, but it had a nice counterweighted crank, so we used it) and the lightened flywheel that had been dynamically balanced with it. We also reused connecting rods, but everything else on the inside of the engine is new. An Engle 120 cam was used, in conjunction with CrMo push rods and bolt together 1.25:1 rockers and shafts. The rockers took an entire weekend to fit and align properly. Even the valve covers had to be replaced with new ones, as the ends of the swivel foot adjusters were running into the stock valve covers. Since we used a new, after market engine case, the stock (used) cooling tin did not all fit properly. The base of the fan shroud had to be trimmed, the webbing on the case is beefier than stock. The tin covering the cylinders also had to be trimmed down.
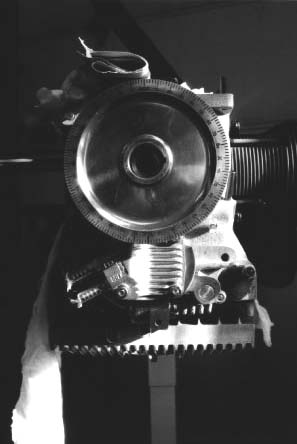
The worst part of the fitting issues did not come to light until the engine was fully assembled, bolted into the Beetle, and ready for run in. When we're running in a new engine, we turn it over without spark plugs at first to get oil pressure. The engine did not spin long enough to gain full oil pressure before it stopped cold and would not spin at all. It was completely stuck. Upon investigation, we discovered that the Aluminum pulley had friction welded itself to the Aluminum case. We use Aluminum pulleys on our VW engines for weight, balance, and because they make the engines easier to time, due to the degree markings. The pulley went on fine, but the clearance for the pulley in the case was not enough, so the heat generated from friction while turning the engine over with the starter was enough to seize the pulley firmly in place. After cleaning out the bits of Aluminum, we installed a stock steel pulley and ran in the engine with that, allowing the steel to make the hole in the case the right size for it. In the future we intend to run in all new engines with a steel pulley, then install the Aluminum one afterwards.
Unfortunately, this whole pulley seizing issue has caused slight damage to the bore in the case around the labyrinth seal. We ran the engine for about a total of 1000 miles in the car before removing it again. It went through easily 10 liters of oil in that time, spewing it out from in front of the pulley, coating the entire tail end of the car. There are two possible solutions to this problem. The first is to scrap and replace the case (sad waste of an expensive case). The second is to install a double lip seal. We plan on attempting the latter, but due to the fact that sand seal cutters that work with the engine fully assembled seem to not be available at the moment, we haven't taken the time to fully disassemble the engine, get the case machined, then re-assemble it again. If we still can't get a sand seal cutter before we need this engine again, we will do the full disassembly.
Discovering the rear suspension issues on the Baja allowed us to put his 1641 back in Giggles (where it had been over winter).
We did manage to finally get our hands on a sand seal cutter, but it was set up wrong and cut too big of a hole in the case for the seal provided. Unfortunately, the Aluminum 1776 still sits in our shelving awaiting a bigger seal or some other soultion to its problems. Our intent is still to get it going one day, and the '56 bus will be able to enjoy some outings with a nice big engine once it ventures out on the road!